Here's all the information of what is happening In My Craft Room - Classes, Events, Sales and a Free Tutorial.....
Hello .
Last week in the craft room was full of layered elegance, creative twists, and a few exciting updates from Stampin’ Up! From reimagining original card designs into something even more refined, to bold masculine fun folds and floral layers that truly shine, there was no shortage of inspiration.
I love how each project reminded us that a simple layout can become something extraordinary with
just a thoughtful change in paper, colour, or texture.
And with new ink pads on the horizon and cabins filling quickly for the Alaska Cruise, there’s so much to look forward to in our creative community.
Stampin' Smiles,
Glenda
Big News from Stampin’ Up! A Fresh Take on Ink Pads
Stampin’ Up! has announced an exciting update to our ink pads.
Beginning in May 2026, we’ll start seeing a brand-new felt pad design housed in a magnetic, stackable case. It’s a thoughtful upgrade focused on performance, easy storage, and smoother crafting all around.
Here’s how the rollout will happen:
2026: Only the new In Colors will be available in the magnetic felt pad style.
2027: As part of a planned colour refresh, all ink colours will transition to the new magnetic felt pads. The current pad style will gradually be phased out.
And here’s the reassuring part: your existing ink pads will continue to work beautifully. There’s no need to replace anything right away. Once the full transition happens, the current style will simply be available while supplies last.
Fresh design, same gorgeous colour we love.
APRIL CLUB, CLASS & MONTHLY TUTORIAL SUBSCRIPTION DETAILS.....
I’m so excited to share that my April Card Class is officially in the works!
This
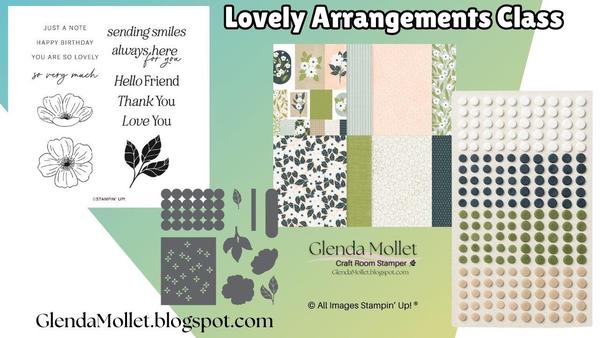
time, I’ve teamed up with the talented Denise Cox from Birdsnest Designs to create something extra special using the beautiful Lovely Blossoms Suite.
We’ll be featuring the Lovely Arrangements stamp set and dies, the stunning Lovely Blossoms Designer Series Paper, and a few additional coordinating products to make these projects shine.
We’re
still putting the finishing touches on the cards, but I can already share the details. This class will include four cards instead of the usual three, plus a Monthly Club Exclusive card and a Monthly Tutorial Subscription exclusive card — six projects in total.
The class fee is $35, and your kit will include supplies for the four main cards, a full package of the
brand-new Natural Matte Dots, and a 6x6 selection of the Lovely Blossoms Designer Series Paper. We originally planned to use the Moody Palette Dots, but they won’t be back in stock in time — and honestly, the Natural Matte Dots are a perfect match.
If you live outside Canada, there will also be a Tutorial Only option available. And if you really love having ongoing inspiration, you can subscribe to my
Monthly Tutorial Subscription and receive three months of tutorials for only $45 — that’s just $15 per month for consistent creative ideas delivered straight to you.
I’ll have the registration link and form ready in Saturday’s newsletter, along with sneak peeks of all six projects. For now, take a look at the beautiful bundle, designer paper, and embellishments we’ll be working with —
I think you’re going to love this one. 💙
Still Thinking About Alaska? 🛳️ Don’t Wait…
If the Alaska Stampin’ Cruise caught your eye when I first announced it, this is your friendly nudge — Balconies sold
out!
👉 For cabin options, pricing details, and booking, please email our Travel Agent Host: Yvette McKay MacPhail at ymckay@trevello.com
My February to April Calendars have been updated with the latest Craft Room News! Click the link below to view and/or download your copy.
Please note, these are not cast in stone and could change in the future. But at least you have the info for
now.
Please note: all times are Pacific Time(add one hour for Mountain Time and add 3 hours for Eastern Time)
CLICK HEREto view and download the updated calendars.
THIS HAPPENED LAST WEEK
IN MY CRAFT ROOM
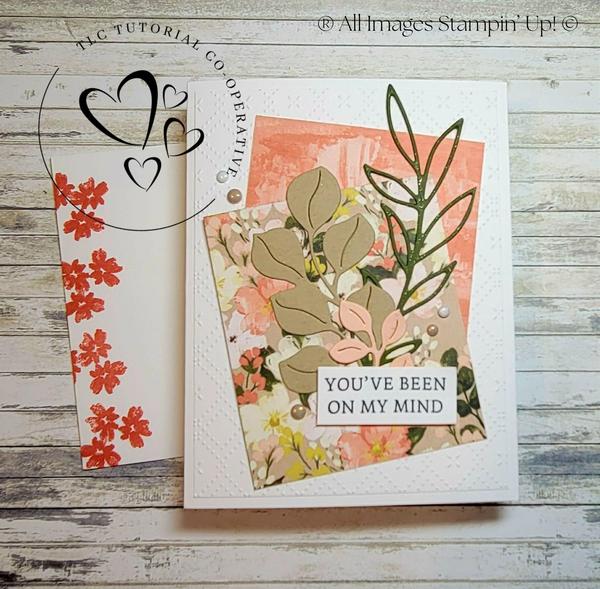
Tuesday, February 17 I went live at 7:30pm (PT) and created a fresh, elegant birthday card using the Brushed With Beauty Bundle. This design featured a horizontal layered layout that allowed the die-cut greenery to truly shine. Set against a soft patterned yellow background, the foliage felt bright and uplifting without overpowering the card. A neutral cream panel in the
centre grounded the design beautifully and kept the focus on the sentiment. I love how versatile this layout is. Once you’ve made it, you can easily switch the designer paper, adjust the foliage colours, or change the greeting to create a completely different look while keeping the same elegant structure.
Stampin' Up! Demonstrator sharing cards and other creations using exclusively Stampin' Up! products.
Wednesday, February 18 My Wednesday newsletter arrived bright and early at 8:00am (PT), a lovely little midweek creative check-in.
Then I was off to the Sunshine Club for our Wednesday morning Stamp Crafts class. So much fun!
That evening at 7:30pm (PT),
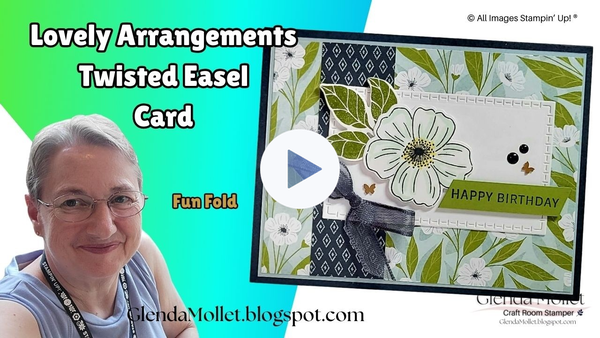
I shared a tutorial featuring the Lovely Arrangements Bundle paired with Lovely Blossoms Designer Series Paper. This layered floral birthday card combined patterned paper, die-cut blooms, dimensional leaves, and soft ribbon accents for a polished, refined finish. We walked through the design step by step, focusing on how to balance bold prints with a clean focal point so the card feels detailed yet harmonious.
In this card tutorial, I'm sharing how to create an elegant birthday card using the Lovely Arrangements bundle and Lovely Blossoms Designer Series Paper. This layered floral card combines patterned paper, die cut flowers, dimensional leaves, and ribbon
accents to create a polished handmade birthday…
Thursday, February 19 One of my favourite evenings of the month was our Craft Room Stampers Team Stamping and Recognition Night. It is always such a special time of creativity, encouragement, and celebrating one another. If joining a supportive and creative community has been on your heart, simply reach out and I will happily share how you can be part of it.
Saturday, February 21
Our monthly Scrapbook Class began at 9:00am, and we worked with the Exploring Nature Scrapbooking Workshop Kit. It was a wonderful morning of preserving memories with beautiful earthy elements and thoughtful page layouts.
Sunday, February 22
I spent the afternoon with the Timberline Seniors Community for our monthly class. There is always so much laughter, creativity, and joy in that room. It is truly one of the highlights of my month.
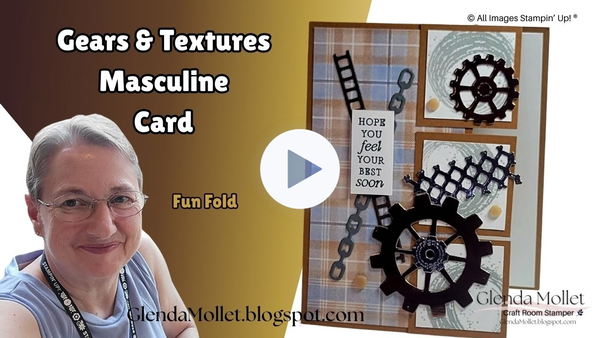
Monday, February 23 I went live at 7:30pm (PT) and had so much fun transforming a floral, feminine card design into something bold and masculine using the Gears & Textures Bundle. This industrial-inspired fun fold featured layered gears, rich textures, and dimensional details that gave it a strong presence. We built the fold together, talked through balancing heavier
design elements, and explored how to add depth without overwhelming the layout. It was such a great example of how one basic design can be completely reimagined with a different theme and palette.
In today's card tutorial, I'm sharing a bold fun fold card created with the Gears & Textures bundle. This industrial-inspired design features layered gear die cuts, chain details, textured backgrounds, and a striking layout perfect for masculine cards
or anyone who loves mechanical-style elements.
THIS IS HAPPENING THIS WEEK
IN MY CRAFT ROOM
Tuesday, February 24
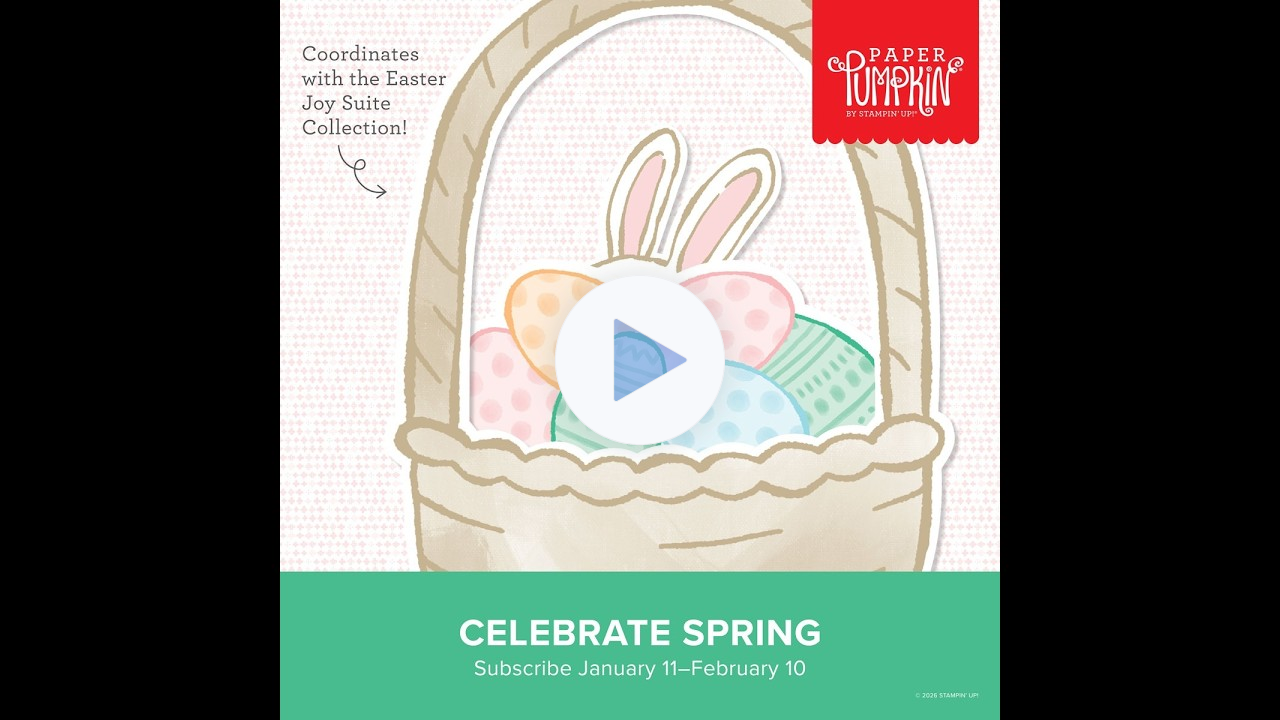
Last night I went live with the February Paper Pumpkin kit – Celebrate Spring, and oh my goodness… we took it up a
notch. Instead of creating the projects as designed, I showed you how to turn the kit into three alternative WOW cards that really elevate the elements and stretch your supplies. If you missed it, you’ll definitely want to catch the replay below — these creative twists might just change the way you look at your Paper Pumpkin kits. 💙
Be sure to follow along on all my channels so you never miss a project.
It's Wednesday and that means the Sunshine Club Seniors group at 10 am!
Tonight at 7:30 pm PT I’ll be live in my VIP Group and on YouTube creating a fun fold card — and this one is going to be fun. I’m taking an existing layout and remaking it on the fly using the Gears & Textures bundle, so you’ll get to see the creative process unfold in real time. If you love watching how a card evolves from idea to finished project, come join me live — and if not, the replay will be waiting for you afterward. 💙
Saturday, February 28
This Saturday is my In Person Spring 2026 Creative Escape, and I cannot wait. We’ll be spending the day creating beautiful
projects featuring the Sweet Bugs and Nature’s Symphony bundles, surrounded by good food, great conversation, and plenty of stamping. It’s one of those days that fills your creative cup and your heart at the same time — a full day of fun, friendship, and projects you’ll be proud to take home. 💜
Monday, March 2 On Monday at 7:30 pm PT I’ll be live on my Facebook Page, in my VIP Group, and on YouTube creating a beautiful new card featuring the Scalloped Wishes bundle. This one has such a sweet, detailed look with those lovely scalloped layers — it’s elegant but still approachable, and I’ll share tips for keeping everything balanced
and polished. I’d love to have you join me live, and of course the replay will be available if you need to watch later. 💜
Exclusive NEW Tool When you Join
Only a couple of days left to grab this amazing tool!
Join Stampin' Up! and you'll get the exclusive NEW Stampin' Positioner added to your Starter Kit! Choose
$165 worth of products to build your own custom Starter Kit and pay only $135; your Stampin' Positioner is automatically added to your kit free of charge.
The NEW Stampin' Positioner is a stamping alignment tool that allows you to stamp precisely aligned images, create repeating patterns easily, and make multiple projects in minutes. See exactly how it works here.
Your Starter Kit also includes FREE shipping, additional business supplies, plus all the fun that comes with
being a part of my team and the Stampin' Up! creative community. You can include any currently available products when you build your own custom Starter Kit, including products from the next Online Exclusive demonstrator preorder meaning you can get March's new products before they are available to customers. To get the most from your FREE Stampin' Positioner, you can also add Stampin' Positioner Grid Paper (169442) to your Starter Kit order.
There are so many perks of being a Stampin'
Up! demonstrator, including a 20-25% product discount, exclusive early access to new products, and the chance to attend demonstrator-only training and crafting events.
If you've earned Stampin' Rewards that are waiting to be spent, don't worry! You'll see the same rewards in your account once you've signed up as a demonstrator, and can spend them on your next order or choose to save them up just the same.
The Stampin' Positioner will be available for purchase at a later date, but
why wait? Sign up online and you'll get yours FREE! Don't delay, as this offer is only available for a limited time and ends on March 2nd.
Free Weekly Tutorial Just For You!
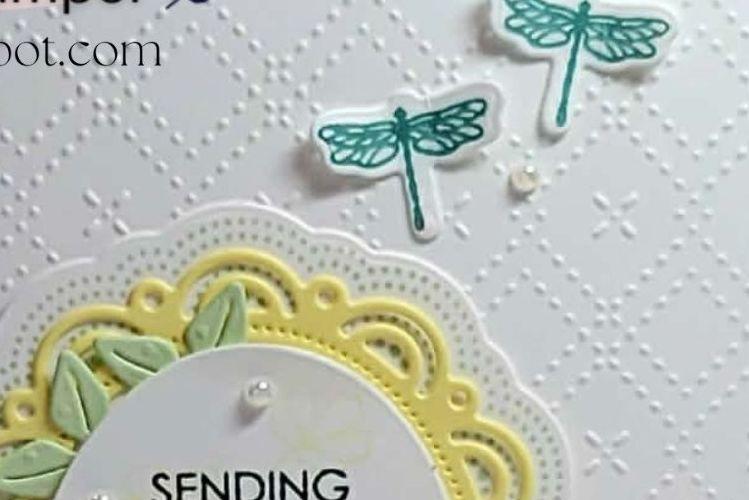
This week’s free tutorial features a softly layered card created with the beautiful Brushed With Beauty suite, highlighting the Words of Beauty and
Petals of Beauty bundles. The design showcases a gentle, elegant colour palette of Calypso Coral, Crumb Cake, Mossy Meadow, and Petal Pink for a look that feels warm and refined.
The star of the card is the Brushed With Beauty Designer Paper, which takes centre stage and sets the tone for the entire layout. Coordinating die cuts add depth and movement, while the Beautiful Pattern embossing folder brings
subtle texture in the background. Pearls of Beauty provide a delicate accent, and a light touch of Wink of Stella adds just the right hint of shimmer.
This design is a wonderful example of letting your designer paper lead the way, with thoughtfully chosen layers and embellishments working together to create a polished, cohesive finish..
I can’t wait to see your creations! Please share them in my Share-It Saturday post over on my Facebook VIP Group
Thank you for crafting along with me, whether you joined live or caught the replay.
Your creativity, encouragement, and shared excitement make this journey so special. I can’t wait to see what we’ll create next together.
Until then, keep those inks inky and those
layers lovely.


.jpg)